Requirements For Indian Visa Application Online:
Requirements for Indian visa application online:
- Determine the type of visa required for your visit.
- Gather all necessary documents, including passport, photographs, and supporting documents.
- Complete the online application form.
- Pay the visa application fee.
- Schedule and attend a visa appointment.
- Submit your application and supporting documents.
- Track the status of your visa application.
Let’s get started on your Indian visa application journey!
Key Takeaways
- Follow specified format and size requirements for supporting documents
- Pay the visa application fee online using a debit or credit card
- Schedule a visa appointment through the official website of the Indian embassy or consulate
- Track the application status through the official website using the application reference number, passport number, and date of birth
Determine the type of visa you need
To determine the type of visa you need, you’ll have to consider various factors such as the purpose of your visit, the duration of your stay, and the activities you plan to engage in. Determining visa eligibility is crucial to ensure a smooth application process.
The Indian visa application process timeline varies depending on the type of visa you require. It is important to note that each visa category has specific requirements and restrictions.
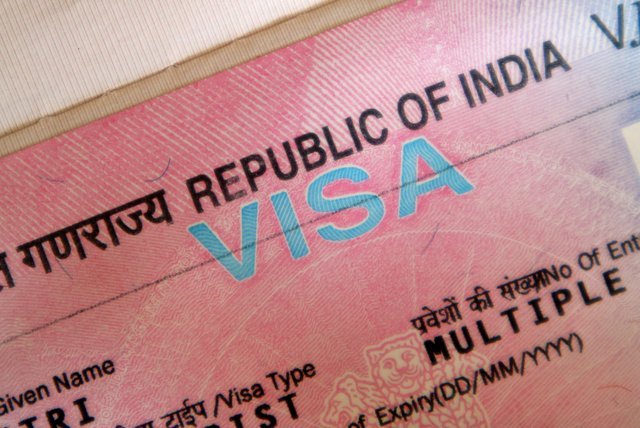
If you are planning to visit India for tourism or leisure purposes, you will need a tourist visa. This visa allows you to explore the country’s vibrant culture, historical landmarks, and natural wonders.
On the other hand, if you are traveling for business purposes, you will need a business visa. This visa enables you to attend meetings, conferences, or negotiate business deals in India.
For those who plan to study in India, a student visa is necessary. This visa allows you to enroll in recognized educational institutions and pursue your academic goals. Additionally, if you are visiting India to seek medical treatment, a medical visa is required. This visa ensures that you can receive the necessary medical care and attention.
As you determine the type of visa you need, keep in mind the duration of your stay. Tourist visas are typically valid for a maximum of 180 days, while business visas can be valid for up to 5 years. Student visas are granted for the duration of the course or program, and medical visas are issued for the duration of the treatment.
Once you have determined the type of visa you need and the duration of your stay, you can transition into the subsequent section about gathering the necessary documents.
Gather the necessary documents
To gather the necessary documents for your Indian visa application online And Indian Visa Customer Support, you’ll need to have your passport and photocopies of the relevant pages ready.
Additionally, make sure to have passport-sized photographs taken according to the specifications provided.
You’ll also need to provide proof of your travel arrangements, accommodation, and financial means to support your stay in India.
Passport and photocopies
In order to complete the Indian visa application online, it is essential to have a valid passport and provide photocopies of it. Your passport should have a minimum validity of six months from the date of your intended arrival in India. Make sure your passport is not damaged or expired, as it may lead to your visa application being rejected.
To begin the visa application process, you will need to upload scanned copies of your passport’s bio page, which contains your personal information. Once you have gathered all the required documents, you can proceed to the next section about passport-sized photographs. It is important to carefully follow the guidelines for the photographs to ensure that your application is processed smoothly.
Passport-sized photographs
When applying for your Indian visa online, it is crucial to remember to bring along your passport-sized photographs. These photographs play a significant role in the application process. To ensure that your photographs are accepted, it is important to follow the photo specifications and visa photo guidelines. The photographs should be recent, in color, and have a white background. Your face should be clearly visible without any shadows or reflections. It is worth noting that the photographs should not be digitally altered or enhanced in any way.
Once you have your passport-sized photographs ready, you can move on to the next section, which covers proof of travel arrangements. It is essential to have all the necessary documents to support your travel plans.
Proof of travel arrangements
Make sure you’ve got your proof of travel arrangements ready, as it’s the key to unlocking your Indian adventure!
When applying for an Indian visa online, you’ll need to provide proof of travel insurance and a detailed itinerary.
The proof of travel insurance is essential to show that you have coverage for any medical emergencies or unexpected events during your trip. It is recommended to obtain travel insurance that specifically covers your stay in India.
Additionally, you need to submit a detailed itinerary outlining your travel plans, including the cities you will be visiting and the duration of your stay in each place. This will help the Indian authorities assess the purpose and duration of your visit.
Once you have gathered these documents, you will be ready to move on to the next section about proof of accommodation, ensuring a smooth visa application process.
Proof of accommodation
Get ready to secure your Indian adventure by providing proof of accommodation for your visa application. The Indian government requires you to show that you have made arrangements for your stay in India. This can be done by booking accommodations in advance and providing the details of your accommodation during the application process.
Whether you plan to stay in a hotel, hostel, or with a friend or family member, make sure you have the necessary documentation to support your stay. This may include hotel reservations, a letter of invitation, or a notarized affidavit from your host.
By providing proof of accommodation, you are demonstrating that you have a place to stay during your visit to India. This is an important step in the visa application process, which will lead us to the next section about proof of financial means.
Proof of financial means
To ensure you have enough money to support your Indian adventure, it is important to provide proof of your financial means. Here are some discussion ideas to help you understand the requirements for proving your financial eligibility:
- Bank statements: Submit your recent bank statements to demonstrate your financial stability.
- Income proof: Provide documents such as salary slips or tax returns to show a steady source of income.
- Traveler’s cheques: Consider purchasing traveler’s cheques as they are widely accepted and can be easily replaced if lost or stolen.
- Sponsorship letter: If you have a sponsor, include a letter from them stating their willingness to financially support you during your stay in India.
When applying for an Indian visa online, make sure you have all the necessary documentation to prove your financial means.
Now, let’s discuss other supporting documents to complete your application.
Other supporting documents
Prepare your application for a seamless Indian adventure by collecting additional supporting documents to enhance your travel experience. In addition to the proof of financial means, there are other required documents that you need to submit.
These documents may include:
- A valid passport with at least six months of validity
- A recent passport-sized photograph
- A copy of your travel itinerary
It is important to ensure that all the documents are clear, legible, and up-to-date. To avoid any potential delays or rejection, double-check the requirements and submit all the necessary supporting documents. Additionally, make sure to follow the guidelines provided by the Indian embassy or consulate.
Completing the online application form is the next step towards obtaining your Indian visa.
Complete the online application form
To successfully complete the online application form for an Indian visa, it’s essential to accurately provide all the required information. Here are some tips for filling out the online application form and common mistakes to avoid:
- Firstly, make sure to carefully read and understand all the instructions provided on the application form. This will help you navigate through the process smoothly. Pay close attention to details such as passport information, personal details, and travel plans. Providing accurate and up-to-date information is crucial to avoid any delays or rejections.
- When filling out the form, be cautious about spelling and grammar mistakes. Double-check all the information before submitting the application. Mistakes in names, dates, or passport numbers can lead to complications and may require additional documentation or amendments.
- Another common mistake to avoid is leaving any required fields blank. Ensure that you have filled out every section of the form, even if it seems optional. Leaving any section incomplete may result in rejection or delays in processing your visa application.
- Additionally, be mindful of the format and size requirements for uploading supporting documents. Make sure your documents are in the specified format (PDF, JPEG, etc.) and within the maximum file size limit. Failure to comply with these requirements may lead to difficulties in submitting your application.
By following these tips and avoiding common mistakes, you can successfully complete the online application form for an Indian visa. Once you have completed the form, the next step is to pay the visa application fee, which will be discussed in the subsequent section.
Pay the visa application fee
Don’t miss out on the next step: it’s time to take care of the payment for your visa application. Paying the visa application fee is an essential part of the visa application process. To proceed with your application, you will need to pay the required fee. Here’s what you need to know about paying the visa application fee:
- Online Payment: You can conveniently make the payment online using a debit or credit card. The online payment system is secure and easy to use. Make sure you have your card details ready before you start the payment process.
- Fee Amount: The visa application fee varies depending on the type of visa you are applying for. The fee amount is determined by the Indian government and is subject to change. You can find the current fee amount on the official website. Ensure that you pay the correct fee to avoid any delays or complications in your application.
- Confirmation: Once you have successfully made the payment, you will receive a confirmation of payment. This confirmation is important as it serves as proof of payment. Make sure to keep a copy of the confirmation for your records.
Now that you have taken care of the visa application fee, the next section will guide you on how to schedule and attend a visa appointment. This is an important step in the application process as it allows you to submit your documents and complete the necessary formalities.
Schedule and attend a visa appointment
Now that you’ve got the payment out of the way, it’s time to set up and go to your visa appointment.
Scheduling your visa appointment is an important step in the Indian visa application process. You will need to visit the official website of the Indian embassy or consulate where you plan to apply for your visa. Look for the section on visa appointments and follow the instructions provided. Make sure to choose a date and time that works best for you and fits within your travel plans.
When attending your visa appointment, it is crucial to bring all the required documents with you. These documents may vary depending on the type of visa you are applying for, but generally, you will need your passport with at least six months of validity remaining, a printed copy of your completed visa application form, and a recent passport-sized photograph. Additionally, you may be required to provide proof of travel arrangements, such as flight tickets or hotel reservations, as well as supporting documents related to the purpose of your visit, such as a letter of invitation or proof of employment.
Once you have successfully scheduled and attended your visa appointment, you can move on to the next step of the application process: submitting your application and supporting documents. This is where you will provide all the necessary paperwork to the visa officer for review. Remember to organize your documents neatly and present them in the order specified by the embassy or consulate.
With your appointment done, you are now ready to submit your application and supporting documents for further processing.
Submit your application and supporting documents
After attending your visa appointment, you can confidently present your neatly organized documents to the visa officer for review and further processing. It is crucial to avoid common mistakes in submitting visa applications to ensure a successful outcome.
First and foremost, double-check that you have included all the required documents, such as your passport, visa application form, and supporting documents like a letter of invitation, travel itinerary, and proof of financial stability. Make sure to provide clear and legible copies of these documents, as any illegible or incomplete information may lead to delays or even rejection of your application.
Another important tip is to thoroughly review your application for any errors or inconsistencies. Pay close attention to details such as your personal information, travel dates, and purpose of visit. Any discrepancies might raise red flags and result in a denial. It is also advisable to provide additional supporting documents that demonstrate your ties to your home country, such as employment letters, property ownership papers, or bank statements.
Once you have gathered and reviewed all the necessary documents, submit your application online through the designated portal. Ensure that you follow the instructions carefully and upload the documents in the specified format. After submission, you will receive a confirmation email or receipt, which you should keep for future reference.
Now that you have successfully submitted your visa application, it is time to track the status of your application. This will allow you to stay updated on its progress and anticipate any additional requirements or actions needed. By monitoring the status, you can stay informed and prepared for the next steps in the process without any delays.
Transitioning into the next section, tracking the status of your visa application will provide you with peace of mind and assurance as you wait for the final decision.
Track the status of your visa application
Monitoring the progress of your visa application will provide you with peace of mind and assurance as you await the final decision. It is important to stay informed about the status of your application to avoid any surprises or delays.
The Indian visa application process can be time-consuming, but by tracking the status, you can stay updated on its progress.
To track the status of your visa application, follow these simple steps:
- Visit the official website of the Indian Embassy or Consulate where you submitted your application.
- Look for the ‘Track Your Application’ or similar option on the website.
- Enter the required details, such as your application reference number, passport number, and date of birth.
- Submit the information and wait for the status update.
By tracking the status online, you can easily check if your application is still under review, approved, or rejected. This information will give you an idea of the visa application processing time and help you plan your travel accordingly.
It is essential to note that visa applications may sometimes get rejected due to various reasons. Common reasons for visa application rejection include:
- Incomplete or incorrect documentation: Ensure that you have provided all the necessary documents and that they are accurate and up-to-date.
- Insufficient funds: You should have sufficient financial resources to cover your travel expenses during your stay in India.
- Criminal record: If you have a criminal record, it may affect your visa application.
- Previous visa violations: Any history of visa violations can negatively impact your chances of getting a visa.
By being aware of these common reasons for rejection, you can take necessary precautions and ensure that your application meets all the requirements. Remember to track the status of your application regularly to stay updated on its progress.
Frequently Asked Questions
Can I apply for an Indian visa online if I am residing in a country other than my home country?
Yes, you can apply for an Indian visa online even if you’re residing in a different country. The visa application requirements for non-residents include submitting necessary documents and completing the online application form.
Do I need to provide a letter of invitation from an Indian sponsor for my visa application?
You don’t need a letter of invitation for an Indian visa application online. The pros are convenience and avoiding the need for a sponsor. Alternative documents like flight itineraries and hotel bookings can be provided instead.
Is it mandatory to have a confirmed flight ticket before applying for an Indian visa online?
Yes, it is mandatory to have a confirmed flight ticket before applying for an Indian visa online. Without a confirmed flight ticket, your visa application may not be accepted if you don’t have a residence in your home country.
Can I submit photocopies of my documents or do they need to be original for my visa application?
You can submit photocopies of your documents for your visa application process. They do not need to be original.
How long does it usually take for an Indian visa application to be processed and approved?
It usually takes about 5-10 working days for Indian visa applications to be processed and approved. Common reasons for visa application rejections include incomplete forms, inaccurate information, and insufficient supporting documents.
Conclusion
In conclusion, you’ve successfully completed the requirements for your Indian visa application online.
To begin, determine the type of visa you need.
Next, gather the necessary documents.
Then, complete the online application form.
Afterwards, pay the visa application fee.
Once that’s done, schedule and attend a visa appointment.
Finally, submit your application and supporting documents.
Now, all you need to do is track the status of your visa application.
Good luck and enjoy your trip to India!