
Are you a Belgian or Italian citizen planning a trip to India? Applying for an Indian visa may seem like a daunting task, but fear not! This article will guide you through the process step by step.
First, you need to determine the type of visa that suits your purpose of visit. Once that’s clear, gather all the required documents, such as your passport, photographs, and supporting documents.
Next, complete the online application form, making sure to provide accurate and up-to-date information. Don’t forget to pay the visa fee before scheduling an appointment at the Visa Application Center.
On the appointed day, attend the appointment and submit all your documents. Finally, keep track of your visa application status to stay informed.
With these instructions in hand, obtaining your INDIAN VISA FOR BELGIAN CITIZENS or INDIAN VISA FOR ITALIAN CITIZENS will be a breeze.
Key Takeaways
- Schedule an appointment at the Visa Application Center and gather all required documents accurately.
- Be prepared for the appointment by arriving early, dressing appropriately, and providing honest and concise answers to the visa officer’s questions.
- Submit all necessary documents at the appointment and stay updated on the status of your visa application through the Indian embassy’s website or the visa application center’s online portal.
- Track the progress of your application to avoid potential issues or delays, and plan your travel arrangements accordingly to ensure a smooth and hassle-free experience.
Determine the Type of Visa You Need
To determine the type of visa you’ll need, consider the purpose of your visit, whether it is for tourism, business, or study, and the duration of your stay in India. This is important because the Indian government offers different types of visas based on the purpose of your visit.
For example, if you are visiting India for tourism, you will need a tourist visa. On the other hand, if you are planning to conduct business activities, a business visa will be required. In case you are going to study in India, you will need a student visa.
Determining visa eligibility is also crucial. Each type of visa has specific eligibility criteria that need to be met. For instance, for a tourist visa, you must have a valid passport with at least six months of remaining validity and a return ticket.
Additionally, understanding visa processing time is essential as it may vary depending on the type of visa you are applying for. It is advisable to apply well in advance to allow sufficient time for processing.
Once you have determined the type of visa you need and checked your eligibility, the next step is to gather the required documents. This includes your passport, visa application form, recent passport-sized photographs, and any supporting documents specific to your visa category. By gathering all the necessary documents, you will be one step closer to successfully applying for an Indian visa.
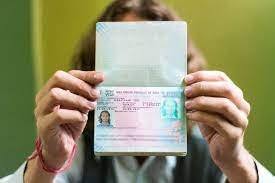
Gather the Required Documents
Make sure you have all the necessary documents ready for your exciting journey to India, so you can smoothly navigate through the visa application process. Here are some tips for submitting your documents accurately and avoiding common mistakes:
- Passport: Ensure that your passport is valid for at least six months beyond your planned departure date from India. Make sure it has at least two blank pages for visa stamps.
- Visa application form: Fill out the online application form and print a copy. Double-check all the information for accuracy and completeness. Any mistakes or missing information can result in delays or rejection.
- Photograph: Attach a recent passport-size photograph to your application form. Follow the specific guidelines provided by the Indian embassy or consulate regarding size, background color, and other requirements.
Submitting the required documents accurately is crucial to a successful visa application. Common mistakes to avoid during document submission include providing incorrect or incomplete information, submitting blurry or incorrect-sized photographs, and forgetting to include any necessary supporting documents.
Once you have gathered all the required documents, you can proceed to the next step of the application process: completing the online application form. This form will require you to provide personal information, travel details, and other necessary information. Remember to review all the provided information carefully before submitting the form.
Now that you have your documents ready, let’s move on to completing the online application form.
Complete the Online Application Form
Now that you’ve gathered all the necessary documents, it’s time to dive into completing the online application form for your exciting journey to India. Filling out the form may seem daunting at first, but with a few tips, you’ll breeze through it and be one step closer to obtaining your Indian visa.
To make the process easier, here are some tips for filling out the online application form:
- Read the instructions carefully: Before you start filling out the form, take the time to read the instructions provided. This will ensure that you understand the requirements and avoid any mistakes.
- Double-check your information: It’s important to provide accurate and up-to-date information in the application form. Double-check all the details you enter, including your personal information, passport details, and travel itinerary.
- Be mindful of the format: The online application form may have specific formats for certain fields, such as dates or phone numbers. Make sure to enter the information in the required format to avoid any errors.
- Save your progress: The online application form may allow you to save your progress and continue at a later time. Take advantage of this feature, especially if you need to gather additional information or consult with others before completing the form.
Now that you have some tips for filling out the online application form, it’s important to be aware of common mistakes to avoid. These include providing incorrect information, leaving any mandatory fields blank, or submitting the form without reviewing it for errors.
Once you’ve completed the online application form and reviewed it for accuracy, it’s time to move on to the next step: paying the visa fee.
Pay the Visa Fee
Paying the visa fee is the next crucial step in progressing towards your exciting journey to India. To make the payment process easier for you, here is a step-by-step guide:
- Visa fee payment methods: There are multiple options available for you to pay the visa fee. You can choose to pay online using a credit or debit card, or opt for the offline payment method by using a bank transfer or demand draft. Whichever method you choose, make sure to keep the payment receipt as proof.
- Calculate the visa fee: Before making the payment, it is important to calculate the exact visa fee applicable to your visa category and duration of stay in India. The fee varies depending on the type of visa you are applying for, such as tourist, business, or employment visa. Visit the official Indian visa website to find the fee structure.
- Visa fee refund process: In case your visa application gets rejected or you cancel your travel plans, you may be eligible for a visa fee refund. The refund process varies depending on the payment method you used. If you paid online, the refund will be processed back to the original payment source. For offline payments, you will need to provide your bank details for the refund.
- Schedule an appointment at the visa application center: After successfully paying the visa fee, you can move on to the next step of scheduling an appointment at the nearest visa application center. This will allow you to submit your documents and biometric data, ensuring a smooth and efficient visa application process.
Now that you have completed the visa fee payment, let’s move on to scheduling an appointment at the visa application center.
Schedule an Appointment at the Visa Application Center
Once you’ve completed the visa fee payment, it’s time to book your appointment at the visa application center for a hassle-free process. To ensure a smooth and efficient visa application process, it is important to schedule an appointment in advance. This allows the visa application center to allocate sufficient time and resources for your appointment.
To schedule your appointment, you will need to visit the official website of the Indian Embassy in Belgium or Italy, depending on your current location. Look for the section dedicated to visa applications and find the link to schedule an appointment. Click on the link and you will be directed to a page where you can select the date and time for your appointment.
To make the process even more convenient, you can use the table below as a guide to gather the required documents for your appointment. This will help you stay organized and ensure that you have all the necessary paperwork ready for submission.
| Required Appointment Documents | Additional Information |
|---|---|
| Valid passport | Make sure your passport is valid for at least six months beyond your intended stay in India. |
| Visa application form | Fill out the application form online and print a copy for your appointment. |
| Passport-sized photographs | Bring two recent color photographs, meeting the specified requirements. |
| Proof of residence | Provide a document that proves your current address, such as a utility bill or rental agreement. |
Once you have scheduled your appointment and gathered all the required documents, you are ready to attend the appointment and submit your documents. This is the next step in the visa application process and will be discussed in detail in the following section.
Attend the Appointment and Submit Your Documents
Don’t miss the opportunity to attend the appointment and submit your documents for a stress-free visa application process that will bring you one step closer to your dream trip to India.
After scheduling your appointment at the Visa Application Center, it’s time to prepare for the interview and gather all the necessary documents. Make sure to check the Indian embassy’s website for a detailed list of required documents for Belgian and Italian citizens. This way, you can ensure that you have everything in order and avoid any last-minute stress.
The visa application process timeline can vary, so it’s important to start early and be proactive. Begin by organizing your documents and filling out the visa application form accurately. Double-check all the information to avoid any mistakes that could cause delays. Additionally, gather any supporting documents required, such as proof of accommodation, flight bookings, and travel insurance.
On the day of your appointment, arrive early and be prepared. Bring all the necessary documents and copies, as well as your passport. Dress appropriately and be ready to answer any questions the visa officer may have regarding your trip to India. Be confident and provide honest and concise answers.
Once you have submitted your documents, it’s time to track the status of your visa application. This will give you peace of mind and keep you informed about the progress. Check the Indian embassy’s website or the visa application center’s online portal for updates. With this information, you can plan your trip accordingly and make any necessary arrangements.
Now that you know how to attend the appointment and submit your documents, it’s time to track the status of your visa application and eagerly await the news of your approved visa.
Track the Status of Your Visa Application
To ensure a smooth and worry-free visa application process, it’s essential for you to stay updated on the progress of your application by tracking its status through the Indian embassy’s website or the visa application center’s online portal. Tracking the status of your visa application provides you with important information and helps you plan your travel accordingly. Here are a few key reasons why tracking your visa application is crucial:
- Visa Application Processing Time:
- The processing time for Indian visas can vary depending on various factors such as the type of visa, the number of applications received, and the current workload of the embassy or visa application center.
- By tracking your application status, you can get an estimate of the processing time and plan your travel arrangements accordingly. This helps you avoid any last-minute rush or inconvenience.
- Common Reasons for Visa Application Rejection:
- While you eagerly wait for your visa application to be processed, it’s important to be aware of the common reasons for visa application rejection.
- Tracking your application status allows you to identify any delays or issues that may arise during the processing. If there are any discrepancies or missing documents, you can rectify them promptly to avoid rejection.
- Peace of Mind:
- Tracking the status of your visa application provides you with peace of mind. You can rest assured knowing that your application is being processed, and you are aware of its progress.
- It eliminates the uncertainty and allows you to make necessary arrangements for your travel plans, such as booking flights and accommodations, with confidence.
By actively tracking the status of your visa application, you can stay informed, avoid potential issues, and ensure a hassle-free travel experience to India.
Frequently Asked Questions
Can I apply for an Indian visa if I am not a Belgian or Italian citizen?
No, you cannot apply for an Indian visa if you are not a Belgian or Italian citizen. Visa eligibility requirements and documentation needed for an Indian visa application are specific to Belgian and Italian citizens.
Is there a specific time frame within which I need to complete the online application form?
You need to complete the online application form for an Indian visa within a specific time frame. Make sure to submit it before the deadline to avoid any delays or issues.
What are the accepted payment methods for the visa fee?
Accepted payment methods for the visa fee include credit and debit cards, as well as online banking. If these options don’t work for you, alternative payment methods like money orders or bank drafts can be used.
Can I reschedule my appointment at the Visa Application Center if I am unable to attend?
Yes, you can reschedule your appointment at the visa application center if you are unable to attend. However, it is important to note that missing your visa appointment can have consequences, so it is best to reschedule as soon as possible.
How long does it usually take to receive a decision on my visa application?
It usually takes a few weeks to receive a decision on your visa application. Visa processing times can vary based on factors such as the type of visa and the volume of applications being processed.
Conclusion
Here is a revised version of the paragraph with adjusted paragraph structure and contractions:
So there you have it! Now you know how to apply for an Indian visa as a Belgian or Italian citizen.
Remember to:
- Determine the type of visa you need
- Gather all the required documents
- Complete the online application form
- Pay the visa fee
- Schedule an appointment at the visa application center
- Attend the appointment and submit your documents
- Finally, track the status of your visa application.
Good luck with your visa application process!