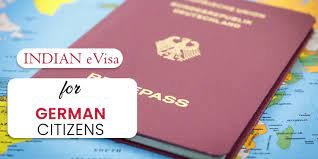
How To Apply Indian Visa From Netherlands And Brazil
Are you planning a trip to India from the Netherlands or Brazil? If so, you’ll need to apply for an Indian visa. This article will guide you through the process, ensuring a smooth and hassle-free experience.
First, you’ll need to understand the visa requirements, such as the type of visa you need and the duration of your stay.
Next, gather all the necessary documents, including your passport, photographs, and supporting documents.
Then, complete the online application form, providing accurate and up-to-date information.
Once your application is submitted, schedule an appointment at the Indian embassy or consulate for a visa interview. It’s essential to attend the interview prepared and with all the required documents.
After that, you can track the progress of your application online.
Finally, once your visa is approved, you’ll receive it, allowing you to embark on your exciting journey to India.
Key Takeaways
- Understand the type of visa and duration of stay required.
- Gather all necessary documents such as passport, photographs, and supporting financial documents.
- Complete the online application form accurately.
- Schedule an appointment at the Indian embassy or consulate for a visa interview.
Understand the Visa Requirements
Now let’s delve into the nitty-gritty of what you need to do to meet the visa requirements.
When applying for an Indian Visa from Netherlands or Indian Visa from Brazil, it’s important to understand the visa application process and the documentation requirements.
The first step in the process is to gather the necessary documents.
To apply for an Indian visa, you will need to fill out an online visa application form. This form requires you to provide personal information, such as your name, date of birth, and passport details. Additionally, you will need to upload a recent passport-sized photograph and a scanned copy of your passport’s bio-data page.
In addition to the application form, you will also need to provide certain supporting documents. These documents may include a copy of your flight itinerary, proof of accommodation in India, and evidence of sufficient funds to cover your stay. It is important to note that the specific documentation requirements may vary depending on the type of visa you are applying for, such as a tourist visa, business visa, or student visa.
Once you have gathered all the necessary documents, you can proceed with the visa application process. It is recommended to submit your application well in advance of your planned travel dates, as visa processing times can vary. After submitting your application, you may be required to attend an appointment at the Indian embassy or consulate for an interview or biometric data collection.
Now that you understand the visa requirements, let’s move on to the next section and discuss how to gather the necessary documents for your Indian visa application.
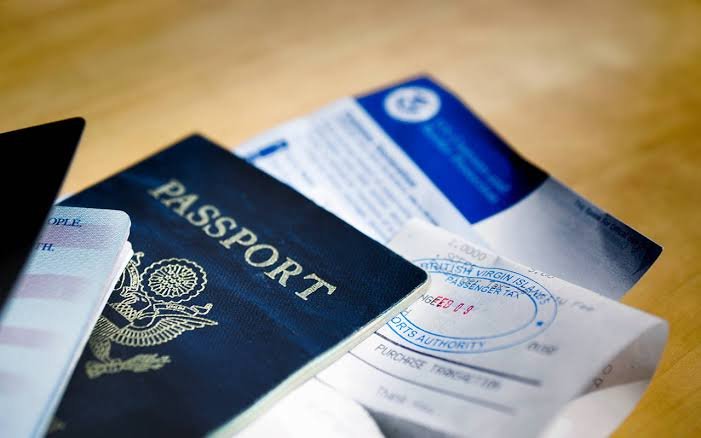
Gather the Necessary Documents
To successfully obtain a visa for India, it’s crucial to ensure you have all the required documentation prepared in advance. The Indian visa application process requires a specific list of documents that you must have.
First and foremost, you will need a valid passport with at least six months of remaining validity and two blank pages for the visa stamp. Make sure your passport meets these criteria before proceeding further.
Additionally, you will need to provide two recent passport-sized photographs that adhere to the specified guidelines. These photographs should be clear, with a white background and without any accessories such as hats or sunglasses.
Along with the passport and photographs, you will also need to provide supporting financial documents to demonstrate your ability to fund your trip to India. This can include bank statements, proof of employment, or any other documents that show your financial stability. It’s important to note that the specific financial requirements may vary depending on the type of visa you are applying for, so make sure to check the official guidelines for your particular visa category.
Once you have gathered all the necessary documents, you can proceed to the next step of the visa application process, which is to complete the online application form.
Complete the Online Application Form
After gathering all the necessary documents, the next step is to fill out the online application form, which will guide you through the process of obtaining your visa for India.
The online application process is designed to be user-friendly and efficient, ensuring a smooth and hassle-free experience for applicants. To begin, you will need to visit the official website of the Indian Visa Application Center and create an account. Once logged in, you will be prompted to provide personal information such as your name, address, and passport details. It is important to double-check all the information you enter to avoid any errors or delays in the processing of your application.
During the online application process, you will also be required to upload scanned copies of the necessary documents, including your passport, recent passport-sized photograph, and proof of residence. Make sure that all the scanned documents are clear and legible to avoid any issues. Additionally, you will need to select your preferred payment method to pay the visa fee. The Indian Visa Application Center accepts various payment methods, including credit cards, debit cards, and online banking.
Once you have completed the online application form and made the payment, you will receive a confirmation email with a reference number. This reference number will be important for scheduling an appointment at the visa application center.
In the next section, we will discuss how to schedule an appointment and submit your application in person. So, let’s move on to the next step and get closer to your Indian visa!
Schedule an Appointment
Ready to move forward in the visa application process? Let’s now talk about how you can conveniently schedule an appointment.
Once you have completed the online application form, the next step is to schedule an appointment at the Indian embassy or consulate in the Netherlands or Brazil. Scheduling an appointment is an important part of the process, as it ensures that you have a specific date and time to submit your documents and have your visa interview.
To schedule an appointment, you will need to visit the official website of the Indian embassy or consulate in your country. Look for the section related to visa services and appointment scheduling. There, you will find a link or button to schedule an appointment online. Click on it and follow the instructions provided. Make sure to have your passport and application details handy, as you may be required to enter them during the scheduling process.
In case you need to reschedule or cancel your appointment, you can do so through the same online system. Simply log in using your appointment confirmation number and email address, and you will have the option to modify or cancel your appointment. Keep in mind that rescheduling or canceling may be subject to availability, so it’s recommended to make any changes as early as possible.
Once your appointment is scheduled, you will be one step closer to obtaining your Indian visa. In the next section, we will discuss how to attend the visa interview and what to expect during the process. So, let’s move on to the next step and get you prepared for the interview.
Attend the Visa Interview
Get ready to showcase your enthusiasm and confidence as you step into the visa interview, where you have the opportunity to make a lasting impression and fulfill your dream of exploring the vibrant culture and breathtaking landscapes of India.
Here are some visa interview tips to help you prepare and increase your chances of success:
- Research common visa interview questions: Familiarize yourself with the typical questions asked during a visa interview. This will allow you to prepare thoughtful and well-articulated answers. Some common questions include your purpose of travel, duration of stay, accommodation arrangements, and financial stability.
- Practice your responses: Practice answering the questions out loud or with a friend or family member. This will help you feel more comfortable and confident during the actual interview. Focus on providing concise and honest answers that clearly demonstrate your intentions and plans while visiting India.
- Dress professionally and maintain a positive demeanor: First impressions matter, so dress professionally and make sure to present yourself in a neat and tidy manner. Maintain a positive attitude throughout the interview and be attentive to the interviewer’s questions. Remember to smile and maintain eye contact to show your sincerity and interest.
As you conclude your visa interview, you will be one step closer to embarking on your Indian adventure.
Next, we will discuss how to track your application to stay informed about its progress.
Track Your Application
It’s important to stay informed about the progress of your application, so make sure to track it regularly. Tracking your Indian visa application can help you stay updated on the status and know when to expect your visa. The process can vary depending on the country you are applying from, but here are some general steps to help you track your application.
To track your application, visit the official website of the Indian visa application center or embassy in your country. Look for the section dedicated to tracking applications and enter the required details such as your application reference number and date of birth. Once you submit the information, the website will display the current status of your application.
To give you an idea of what to expect, here is a table showcasing the average visa processing time for Indian visas from the Netherlands and Brazil:
| Country | Visa Processing Time |
|---|---|
| Netherlands | 3-5 working days |
| Brazil | 10-15 working days |
Please note that these processing times are just an estimate and can vary depending on various factors. It’s always a good idea to check the official website for the most accurate information.
Once your visa application is approved and processed, you will receive your visa. In the next section, we will discuss how to receive your visa and what to do next.
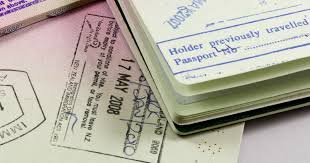
Receive Your Visa
Wait for the processing of your visa application and be patient during this time. Once your visa is approved, you can collect your passport with the Indian visa from the embassy or consulate.
Take the time to carefully verify all the details on the visa and ensure its accuracy before your trip.
Wait for the processing of your visa application
Once you’ve submitted your visa application, you’ll need to wait for its processing. Patience is truly a virtue during this period. The processing time can vary depending on factors such as the type of visa and the current workload of the embassy or consulate. To check the status of your application, visit the official website of the Indian embassy or consulate in the Netherlands or Brazil. They usually have an online portal where you can enter your application details for updates on its progress. Keep in mind that the processing time is an estimate and may change. Therefore, it’s best to regularly check the status of your application to stay informed. Once your visa is approved, you can proceed to collect your passport with the Indian visa from the embassy or consulate.
Collect your passport with the Indian visa from the embassy or consulate
Once you have successfully completed the visa application process, you can proceed to collect your passport from the embassy or consulate. This passport will now include the approved Indian visa. To facilitate the passport collection process, follow these steps:
- Schedule an appointment: Contact the embassy or consulate to schedule a convenient time for passport collection.
- Required documents: Bring the necessary documents, such as your application receipt, identification, and proof of payment of the visa application fees.
- Security checks: Upon arrival at the embassy or consulate, you may need to go through security checks, including bag screening and metal detectors.
- Collect your passport: Present your identification and application receipt to the embassy or consulate staff. They will hand over your passport with the approved Indian visa.
After collecting your passport, it is crucial to verify the details on the visa and ensure its accuracy before your trip. This will help avoid any complications during your travel to India.
Verify the details on the visa and ensure its accuracy before your trip
Make sure to double-check all the information on your visa and ensure its accuracy before you embark on your exciting trip to India! It is essential to review your visa application and verify that all the details are correct. Pay close attention to the expiration date of your visa as well, as you don’t want to encounter any issues during your stay in India. To help you with the verification process, use the table below as a guide:
| Information to Double-Check | How to Verify |
|---|---|
| Name and Passport Number | Compare with your passport |
| Visa Type | Confirm it matches your purpose of travel |
| Entry and Exit Dates | Check if they align with your planned itinerary |
| Visa Validity | Ensure it covers the duration of your stay |
| Visa Conditions | Review any restrictions or special conditions |
By carefully reviewing your visa and confirming its accuracy, you can avoid any complications while travelling in India.
Frequently Asked Questions
How long does it take to process an Indian visa application from the Netherlands and Brazil?
The average processing time for an Indian visa application from the Netherlands and Brazil is typically around 5-10 working days. Make sure to have all the necessary documentation requirements ready for a smooth application process.
Can I apply for an Indian visa if I hold a passport from a country other than the Netherlands or Brazil?
Yes, you can apply for an Indian visa if you hold a passport from a country other than the Netherlands or Brazil. Make sure to check the passport requirements and visa application fees for your specific country.
Are there any specific requirements for Indian visa applicants from the Netherlands and Brazil?
To apply for an Indian visa from the Netherlands or Brazil, specific requirements apply to visa applicants. Make sure to meet these requirements, such as submitting the necessary documents and completing the application accurately.
Is it possible to expedite the visa application process for urgent travel plans?
Yes, it is possible to expedite the visa application process for urgent travel plans. You can request expedited visa processing and explore alternative visa options to ensure your travel plans are not affected.
Can I track the progress of my Indian visa application online?
Yes, you can easily track the progress of your Indian visa application online. The tracking process allows you to stay updated on the status of your online application, ensuring a seamless experience.
Conclusion
So there you have it! Applying for an Indian visa from the Netherlands or Brazil may seem like a daunting process, but by following the steps outlined in this article, you can successfully navigate the application process.
- Remember to carefully review the visa requirements.
- Gather all necessary documents.
- Complete the online application form.
- Schedule an appointment.
- Attend the visa interview.
- Track your application.
- Finally, receive your visa.
Good luck and enjoy your trip to India!