
Indian visa for Aruba and Bahamas citizens:
Are you a citizen of Aruba or the Bahamas looking to visit India? Well, you’re in luck! The Indian government has implemented an E-Visa system that makes the visa application process easier and more convenient for travelers like you.
In this article, we will guide you through the process of obtaining an Indian visa, from understanding the different types of visas available to gathering the required documents.
We will also provide you with step-by-step instructions on how to complete the E-Visa application process and offer tips on preparing for a visa interview, if applicable.
Once you have successfully secured your visa, we will help you navigate through the immigration process upon arrival in India. Additionally, we will provide you with valuable information on exploring India and offer cultural etiquette tips to ensure a smooth and enjoyable trip.
So, let’s dive in and get you ready for your exciting adventure in India!
Key Takeaways
- Indian E-Visa System offers a streamlined and convenient online application process, eliminating the need for long queues and paperwork.
- Different types of visas are available for various travel purposes, including Tourist Visa, Business Visa, Medical Visa, and Conference Visa, each with its own eligibility criteria and processing time.
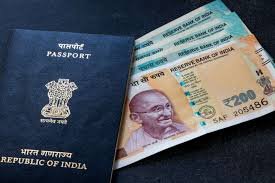
- Required documents for an Indian visa include a valid passport, recent passport-sized photographs, proof of travel itinerary and accommodation, and proof of income to meet financial requirements.
- The Indian immigration process involves navigating entry and exit procedures, understanding customs and immigration regulations, ensuring compliance with visa conditions, and obtaining necessary permits or clearances if required.
Overview of the Indian E-Visa System
You may be interested in learning about the Indian E-Visa System, which provides an overview of the visa process for citizens of Aruba and the Bahamas. Understanding visa requirements is crucial before planning your trip to India.
The Indian E-Visa System offers a streamlined and convenient way for travelers to obtain their visas online.
One of the key benefits of the Indian E-Visa System is its simplicity. Gone are the days of long queues at the embassy and endless paperwork. With just a few clicks, you can apply for your visa from the comfort of your own home. The process is entirely online, saving you time and hassle.
Another advantage of the Indian E-Visa System is the quick processing time. Once your application is submitted, you can expect to receive your visa within 72 hours. This expedited process allows you to plan your trip with ease and peace of mind.
It’s important to note that there are different types of Indian visas available, each with its own set of requirements and limitations. Understanding the different types of Indian visas will help you determine which one is most suitable for your travel needs. From tourist visas to business visas, the Indian E-Visa System offers a range of options to cater to various purposes of travel.
Now that you have a better understanding of the Indian E-Visa System and its benefits, let’s dive deeper into understanding the different types of Indian visas.
Understanding the Different Types of Indian Visas
Explore the various categories of visas available for travel to India, each with its own unique set of requirements and duration of stay. Here are the different types of Indian visas that you can choose from:
- Tourist Visa: If you’re planning to visit India for tourism purposes, the tourist visa is the perfect option for you. It allows you to stay in the country for up to 90 days and is valid for multiple entries within a year.
- Business Visa: If you’re traveling to India for business-related activities such as attending conferences or meetings, the business visa is what you need. It allows you to stay in India for up to 180 days and is also valid for multiple entries.
- Medical Visa: If you’re seeking medical treatment in India, the medical visa is the right choice. It allows you to stay in the country for a specified period, depending on the nature of your treatment.
- Conference Visa: If you’re attending a conference or seminar in India, the conference visa is suitable for you. It allows you to stay in India for the duration of the conference or seminar.
When it comes to the Indian e-visa system, eligibility criteria and processing time may vary depending on the type of visa you choose. It’s important to carefully review the requirements and ensure that you meet all the criteria before applying.
Once you have explored the different types of visas and identified the one that suits your purpose, the next step is to gather the required documents for your visa application.
Gathering the Required Documents
To apply for an Indian visa, you’ll need to gather the required documents. These include:
- Your valid passport
- Recent passport-sized photographs that meet the specified requirements
You’ll also need to provide:
- Proof of your travel itinerary and accommodation
- Proof of income to meet the financial requirements
Make sure you have all these documents ready before applying for your Indian visa.
Passport and Photograph Requirements
When applying for an Indian visa, there are certain requirements for your passport and photograph that you need to keep in mind. Firstly, your passport should be valid for at least six months and have two blank pages for the visa stamp. It is crucial to check your passport’s validity before applying to avoid any delays or complications.
In addition to the passport requirements, the Indian government has specific specifications for the photograph that you need to follow. The photo should be passport-sized, in color, and taken against a white background. It should also have a matte or semi-matte finish.
To summarize, here are three key points to consider when submitting your passport and photograph for an Indian visa:
- Passport validity: Ensure that your passport is valid for at least six months from the date of your planned entry into India.
- Photo specifications: Your photo should be recent, clear, and meet the specified size and format requirements.
- Blank pages: Make sure your passport has two consecutive blank pages for the visa stamp.
Once you have gathered all the necessary documents, it’s time to move on to the next section about proof of travel itinerary and accommodation.
Proof of Travel Itinerary and Accommodation
Having a well-documented travel itinerary and proof of accommodation is essential for a smooth visa application process. When applying for an INDIAN VISA FOR ARUBA CITIZENS or INDIAN VISA FOR BAHAMAS CITIZENS, it is important to provide proof of your travel plans and booking accommodations.
This can include flight itineraries, hotel reservations, or any other documentation that shows your intended travel dates and places of stay. This helps the Indian authorities assess the purpose and duration of your visit, ensuring that you have a legitimate reason for entering the country.
Furthermore, having a confirmed accommodation booking demonstrates that you have planned your trip in advance and have the means to support yourself while in India.
Once you have gathered all the necessary documents for your travel itinerary and accommodation, you can move on to the next section regarding financial requirements and proof of income.
Financial Requirements and Proof of Income
Now that you have gathered your proof of travel itinerary and accommodation, it’s important to also consider the financial requirements and proof of income for your Indian visa application.
To ensure that you meet the necessary criteria, you will need to provide evidence of your financial stability and ability to support yourself during your stay in India. This can be done by submitting bank statements, salary slips, or any other document that proves your financial capability.
Additionally, it is important to note that the specific financial requirements may vary depending on the type of visa you are applying for. Be sure to check the Indian embassy or consulate’s website for the most accurate and up-to-date information.
Once you have met all the necessary financial requirements, you can proceed to the next step of completing the e-visa application process.
Completing the E-Visa Application Process
To complete the e-visa application process, you’ll need to follow a step-by-step guide to filling out the application form.
Once you have filled out the form, you can pay the visa fee online.
After submitting the application, you can track its status online to stay updated on the progress.
Step-by-Step Guide to Filling Out the Application Form
First, carefully review the step-by-step guide to successfully complete the application form for an Indian visa as an Aruba or Bahamas citizen.
Here are some helpful tips to ensure a smooth application process:
- Double-check all personal information: Avoid common mistakes like misspelling your name or providing incorrect passport details.
- Provide accurate travel details: Make sure to include your intended date of arrival and departure, as well as the purpose of your visit to India.
- Upload the required documents: Prepare all necessary documents, such as a scanned copy of your passport and a recent passport-sized photograph, before starting the application.
- Review and submit: Take a moment to review all the information you have entered before submitting the form. Once submitted, you cannot make changes.
Now that you have successfully filled out the application form, let’s move on to the next step of paying the visa fee online.
Paying the Visa Fee Online
Once you’ve successfully completed the application form, the next step is to conveniently pay the visa fee online. This method offers several benefits, including ease of use and time-saving. By paying online, you can avoid the hassle of visiting a bank or waiting in long queues. Additionally, online payment provides a secure and reliable option, ensuring the safety of your transaction. To further highlight the advantages of this method, take a look at the table below:
| Benefits of Online Visa Payment | Common Issues with Online Visa Payment |
|---|---|
| Convenient and time-saving | Payment failure due to technical issues |
| Secure and reliable | Incorrect payment amount entered |
| No need to visit a bank | Difficulty in accessing payment portal |
By opting for online payment, you can conveniently track the status of your application. Simply follow the subsequent section to stay updated on the progress of your Indian visa application.
Tracking the Application Status
Tracking the status of your application becomes easier and more convenient when you opt for online payment. Once you have submitted your application, you can easily track its progress online.
The Indian visa website provides a tracking feature that allows you to check the status of your application using your application ID and passport number. This tracking application process gives you real-time updates on the progress of your visa application, ensuring that you are always aware of where it stands.
Keep in mind that visa processing time can vary depending on various factors such as the type of visa and the volume of applications. Therefore, it is advisable to track your application regularly to stay informed.
Once your application is approved, you can move on to preparing for the visa interview (if applicable), where you will have the opportunity to showcase your intentions and plans for visiting India.
Preparing for the Visa Interview (if applicable)
To ensure a successful visa interview, it’s crucial to be well-prepared and confident in your responses. Here are some visa interview tips to help you feel more prepared and increase your chances of a positive outcome:
- Dress appropriately: It’s important to make a good first impression, so dress professionally for the interview. Avoid wearing casual attire and opt for formal or business attire instead.
- Research common visa interview questions: Take the time to research and familiarize yourself with common visa interview questions. This will help you prepare thoughtful and concise answers, showcasing your genuine intentions to visit India.
- Practice your responses: Practice answering the questions out loud or with a friend or family member. This will help you become more comfortable and articulate during the actual interview.
Remember, the visa interview is an opportunity for the consular officer to assess your eligibility and intentions to visit India. Be honest, confident, and concise in your responses.
After the interview, you can move on to the next step, which involves arriving in India and going through the immigration process.
Arriving in India and Immigration Process
When arriving in India, you’ll need to go through immigration procedures at the Indian airports. This includes presenting your passport and visa, filling out necessary forms, and having your fingerprints and photo taken.
Additionally, you’ll need to comply with customs and baggage regulations. This may involve declaring any items of value or restricted goods that you’re carrying with you.
Immigration Procedures at Indian Airports
Upon arrival at Indian airports, you’ll be amazed by the efficient immigration procedures that ensure a seamless entry into the country. Here are some key features of the immigration procedures at Indian airports:
- Visa Verification: Present your passport and visa at the immigration counter for verification. Make sure your visa is valid for the intended duration of your stay.
- Biometric Data Collection: Your fingerprints and photograph will be captured as part of the biometric data collection process. This helps in ensuring the security of your entry into the country.
- Arrival Card: Fill out the arrival card with your personal details and purpose of visit. Keep it handy along with your passport.
- Customs Declaration: If you have any dutiable or prohibited items, declare them on the customs form. Be aware of the customs and baggage regulations to avoid any issues during immigration.
With immigration procedures completed smoothly, it’s time to move on to the next section about customs and baggage regulations for Aruba and Bahamas citizens.
Customs and Baggage Regulations for Aruba and Bahamas Citizens
After completing the immigration procedures smoothly, it’s time to familiarize yourself with the customs and baggage regulations for Aruba and Bahamas citizens traveling to India.
When you arrive at an Indian airport, you will need to go through customs, where your luggage will be inspected. It is important to note that certain items such as firearms, narcotics, and counterfeit currency are strictly prohibited. Make sure to declare any dutiable or prohibited goods to avoid any legal complications.
Additionally, there are limits on the amount of alcohol and tobacco that you can bring into the country. Familiarizing yourself with these customs regulations will ensure a hassle-free entry into India.
Now that you are aware of the customs and baggage regulations, let’s move on to the next section about exploring India and cultural etiquette tips.
Exploring India and Cultural Etiquette Tips
To fully immerse yourself in the vibrant culture of India, it’s important to familiarize yourself with the country’s customs and etiquette. Here are some tips to help you navigate your way through this fascinating country:
- Indian cuisines: Indulge in the diverse flavors of Indian cuisines, from spicy curries to savory street food. Don’t be afraid to try new dishes and embrace the local flavors. Remember to eat with your right hand, as it is considered more hygienic and respectful.
- Must visit tourist attractions: Explore the iconic Taj Mahal in Agra, a symbol of eternal love and architectural masterpiece. Visit the historic Red Fort in Delhi, where you can immerse yourself in the rich history of the Mughal Empire. Don’t miss the stunning palaces and lakes in Udaipur, known as the Venice of the East. Discover the bustling markets of Jaipur, famous for its colorful textiles and handicrafts. And of course, take a boat ride along the serene backwaters of Kerala for a truly tranquil experience.
- Dress modestly: India is a conservative country, so it’s important to dress modestly, especially when visiting religious sites. Opt for loose-fitting clothing that covers your shoulders and knees, and avoid wearing revealing or excessively flashy attire.
- Respect local customs: Indians value respect and you can show it by greeting people with a namaste, a traditional Indian gesture of respect. Remove your shoes before entering someone’s home or a place of worship. Avoid public displays of affection, as it is considered inappropriate in Indian culture.
- Be mindful of personal space: India is a densely populated country, so personal space can be limited. Be prepared for crowded places and try to be patient and polite, even in chaotic situations.
With these cultural etiquette tips in mind, you’ll be able to navigate India with ease.
In the next section, we will provide you with some final tips for a smooth visa process.
Conclusion and Final Tips for a Smooth Visa Process
Make sure you have all the necessary documents and information ready before applying for your visa to ensure a smooth process. When it comes to visa application tips, there are a few common mistakes to avoid.
First and foremost, double-check that you have filled out the application form correctly and completely. Any missing or incorrect information can lead to delays or even rejection of your visa application.
It is also essential to provide all the required supporting documents, such as your passport, photographs, proof of travel plans, and financial statements. Missing any of these documents can cause unnecessary complications.
Another crucial tip is to pay attention to the visa application fee. Make sure you are aware of the exact amount and the acceptable payment methods. Incorrect payment or insufficient funds can lead to rejection or delays in processing your visa application.
Additionally, it is recommended to apply for your visa well in advance. Processing times may vary, and it is better to have ample time to address any issues or additional requirements that may arise during the process.
Lastly, be cautious and avoid submitting fraudulent or false information. Providing inaccurate information can result in serious consequences, including being banned from entering India in the future. It is always better to be honest and transparent throughout the visa application process.
By following these visa application tips and avoiding common mistakes, you can ensure a smooth and successful visa process. Remember to stay organized, pay attention to details, and provide all the necessary documents and information accurately. Good luck with your Indian visa application!
Frequently Asked Questions
Are there any restrictions or limitations on the duration of stay for Aruba and Bahamas citizens applying for an Indian visa?
There are no specific restrictions or limitations on the duration of stay for Aruba and Bahamas citizens applying for an Indian visa. The visa validity and entry requirements will apply to all applicants.
Can Aruba and Bahamas citizens apply for a multiple-entry visa to India?
Yes, Aruba and Bahamas citizens can apply for a multiple-entry visa to India. To apply, you need to meet the Indian visa requirements for Aruba and Bahamas citizens and follow the process of applying for an Indian visa from Aruba and Bahamas.
Is it possible to extend the duration of stay in India for Aruba and Bahamas citizens who have already obtained a visa?
You can extend your stay in India by applying for a visa extension through the appropriate authorities. This will allow you to further explore the country and experience its rich culture beyond the popular tourist destinations.
What should Aruba and Bahamas citizens do if their e-visa application is rejected?
If your e-visa application is rejected, you have options for reapplying. Consider applying for a regular visa or exploring alternatives like visa on arrival or contacting the Indian embassy for further assistance.
Are there any specific vaccinations or health requirements for Aruba and Bahamas citizens traveling to India?
You don’t need any specific vaccinations or health requirements for your trip to India. However, it is always recommended to check with your doctor and ensure you have necessary travel documentation in place.
Conclusion
In conclusion, obtaining an Indian visa for citizens of Aruba and the Bahamas is a straightforward process. By understanding the different types of visas, gathering the necessary documents, and completing the e-visa application process, you can ensure a smooth visa process.
If a visa interview is required, be prepared and confident. Once you arrive in India, familiarize yourself with the immigration process and respect the local customs and etiquette.
Enjoy your time exploring India and have a wonderful trip!